Quick start: no code needed
The simplest way to get Sushi ML Studio running. Everything happens in your browser: no code, no terminal and nothing to install. It takes about ten minutes, most of it waiting for AWS.
You need: an AWS account, with permission to subscribe to AWS Marketplace products and to launch EC2 instances.
Comfortable with AWS already?
This page uses the recommended settings throughout. The Working on the instance pages cover key pairs, SSH, tunnels and JupyterLab, for when you want more control.
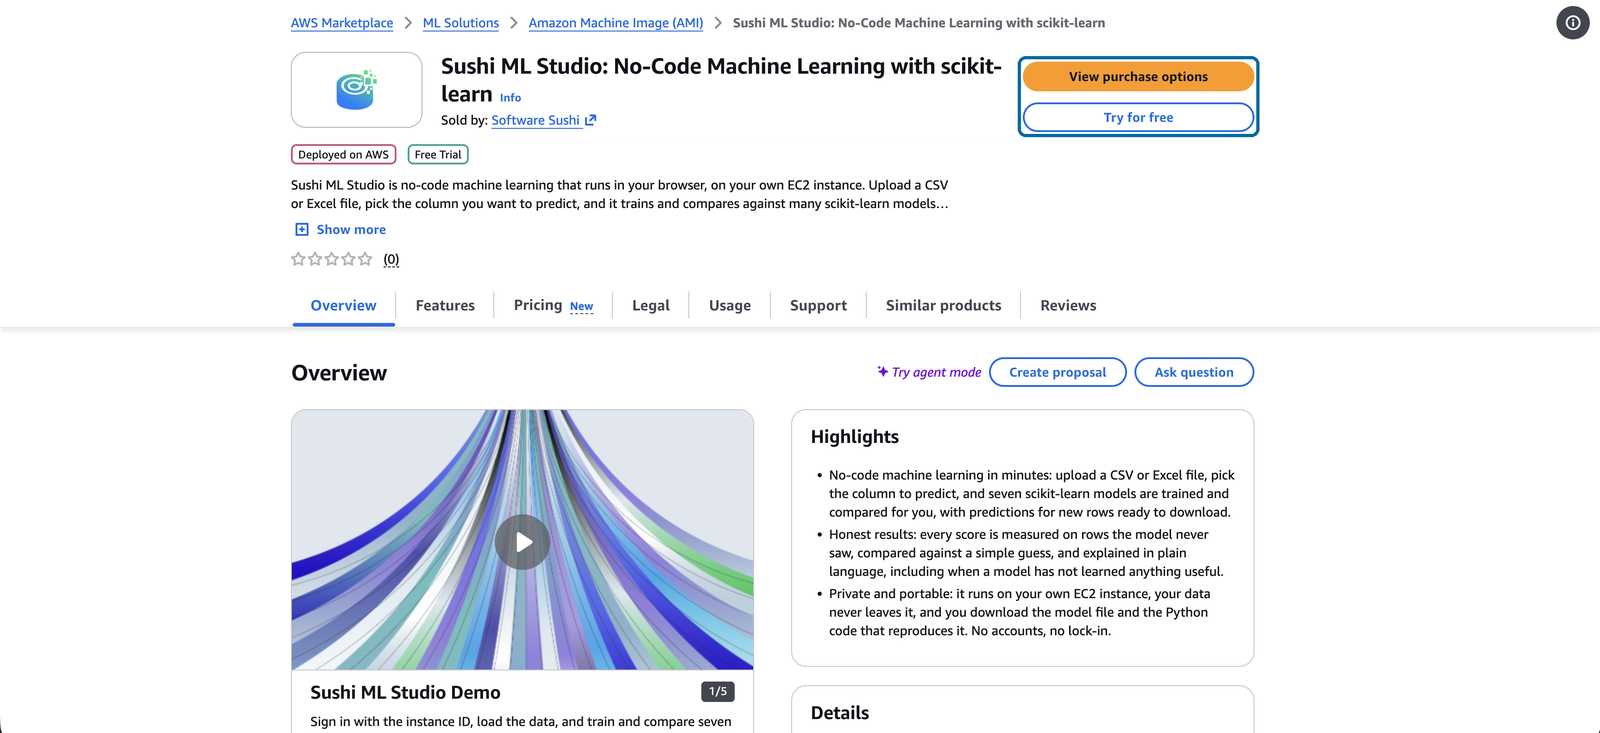
1. Open the listing
On the Sushi ML Studio page in AWS Marketplace, choose Try for free to start the 7-day free trial. View purchase options shows the same subscription with its pricing.
2. Subscribe
Review the terms and choose Subscribe.
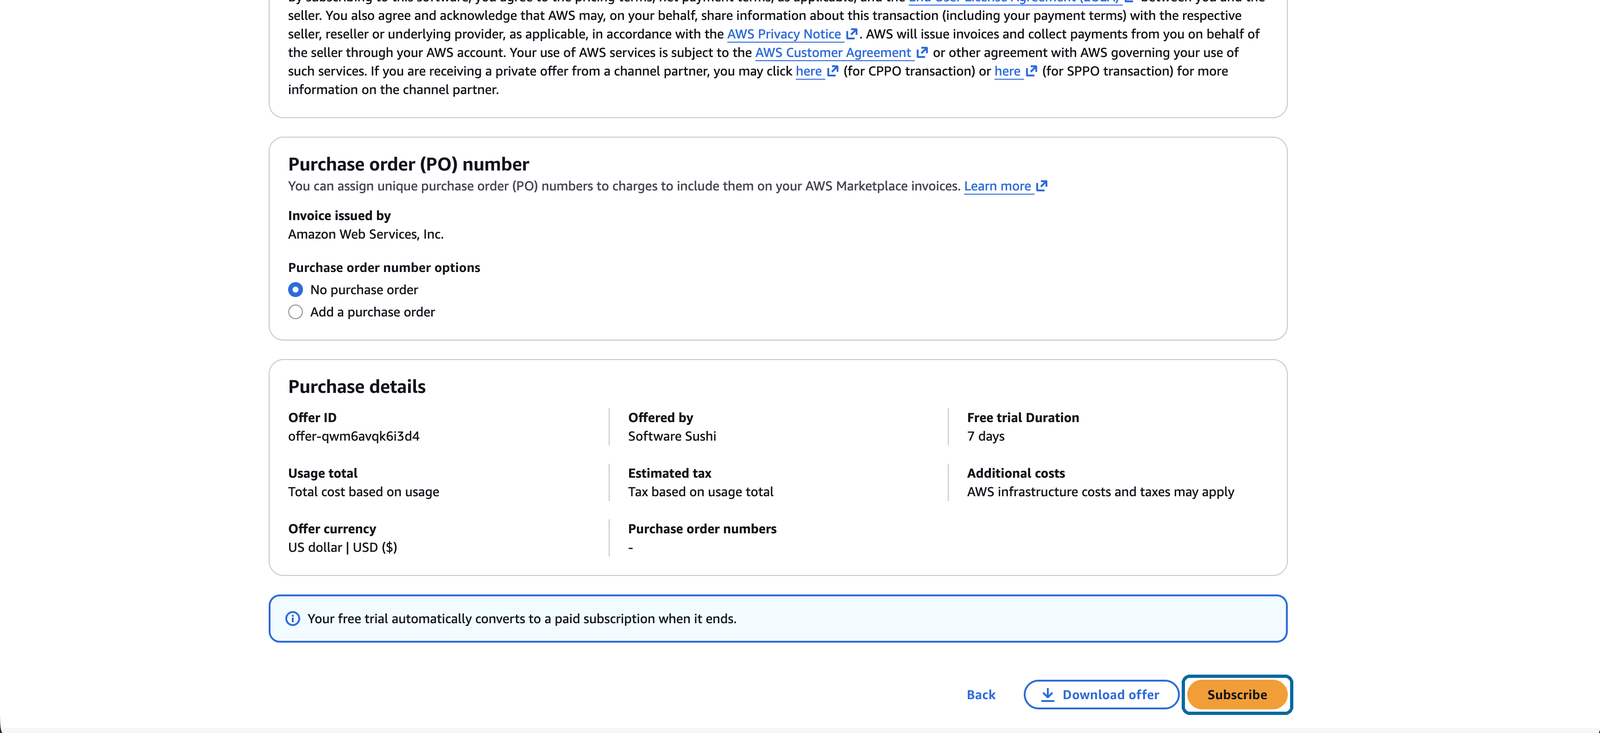
About the free trial
- The trial starts when you subscribe and lasts 7 days, whether or not the instance is running.
- It covers one instance. Any other instances you run at the same time are billed at the hourly rate.
- When it ends, it turns into a paid subscription automatically. From then on, the software is billed by the hour, only while an instance is running.
- AWS bills the EC2 instance itself as usual, from the start, trial or not.
- Stopping the instance stops the hourly charges. Its disk is still billed until you terminate it.
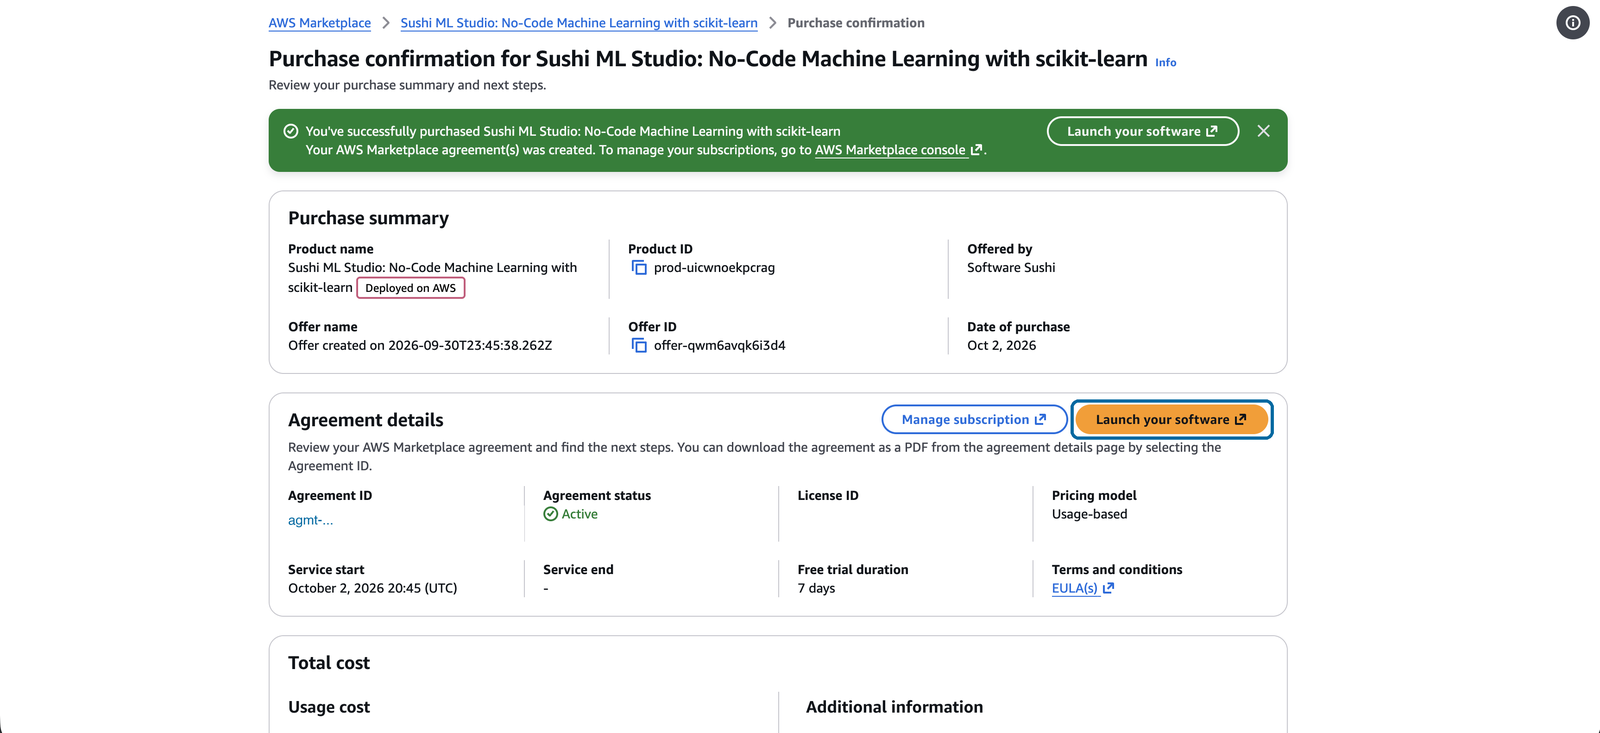
3. Launch your software
When the purchase is confirmed, choose Launch your software.
4. Check the launch page
AWS opens its Launch an instance page with everything already filled in:
the Sushi ML Studio image and a t3.medium instance, the recommended size.
You do not need to change anything. If you like, give the instance a name
under Name and tags, so you can find it later.
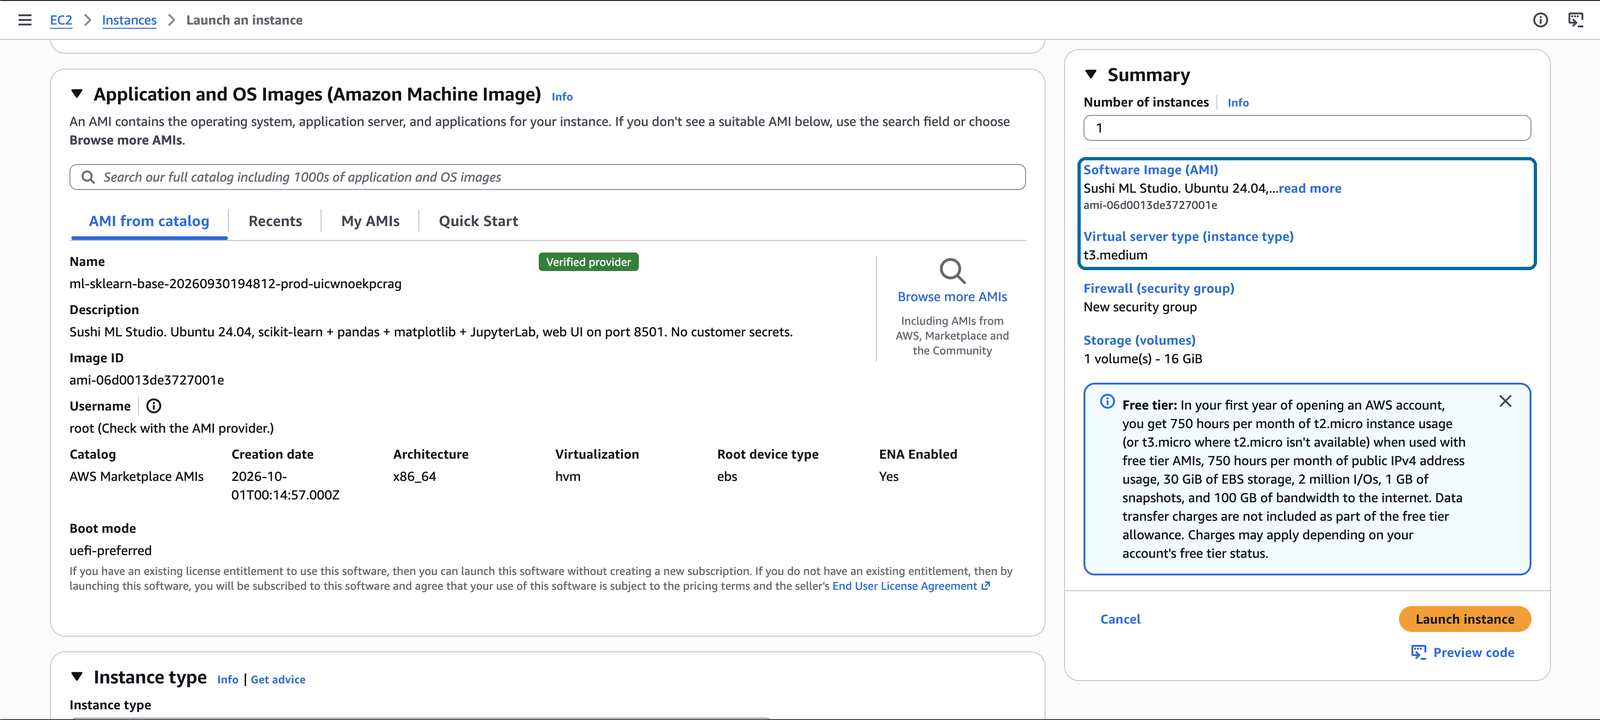
Ignore the user name shown here
The page may show Username: root. You do not need a user name for
anything in this guide. If you connect to a terminal later, the user name
is ubuntu.
5. Keep the recommended security group
Under Network settings, leave Create security group selected, with the two rules we recommend already ticked:
- Allow CUSTOMTCP traffic is the Studio itself, on port 8501.
- Allow SSH traffic lets you open a terminal on the instance later, if you ever need to, for example with EC2 Instance Connect in the browser.
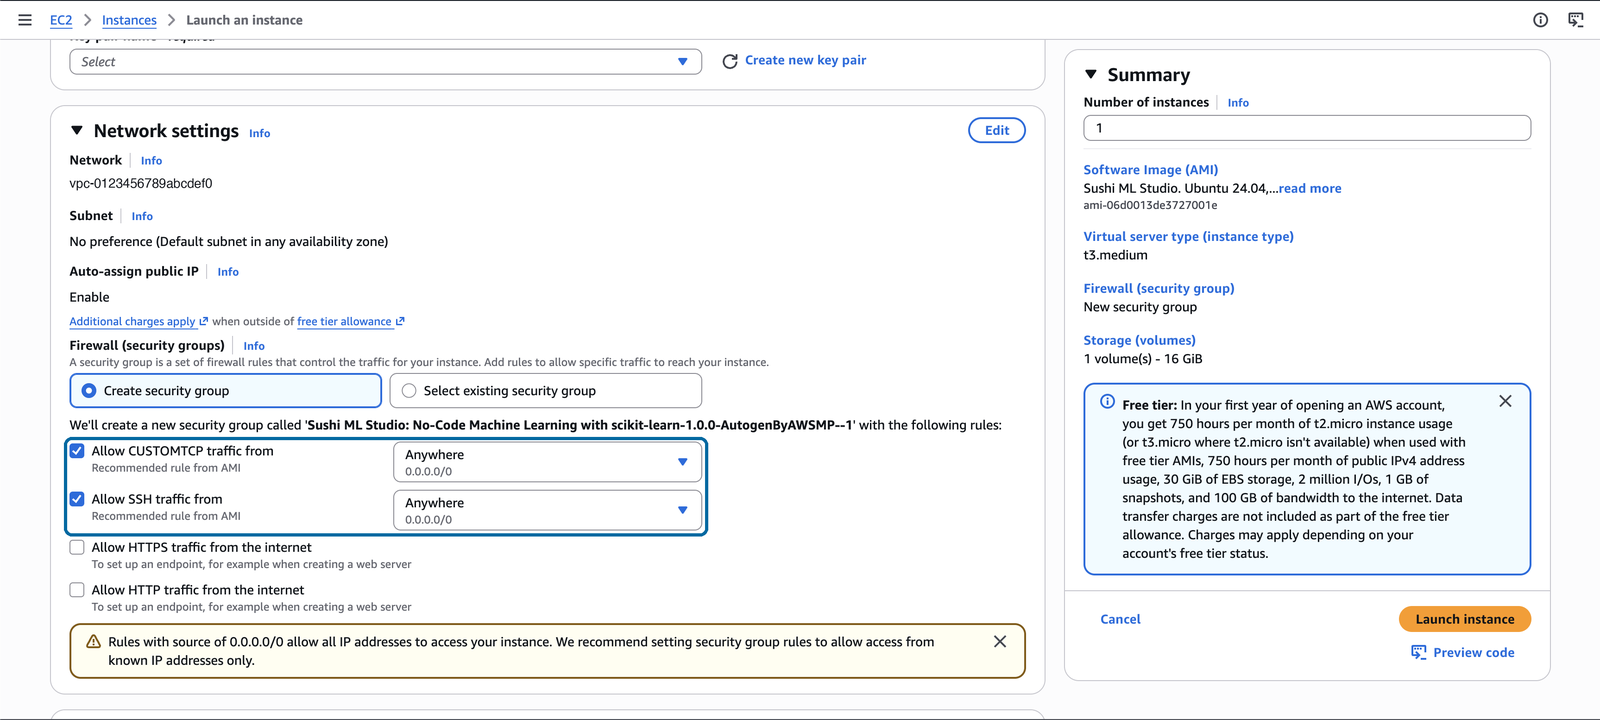
AWS warns that 0.0.0.0/0 allows any address. That is expected: it means you
can reach the Studio from wherever you are, and the Studio asks for a password
before it shows anything. You can narrow it to your office or VPN later, see
Reach the Studio privately.
6. Launch, without a key pair
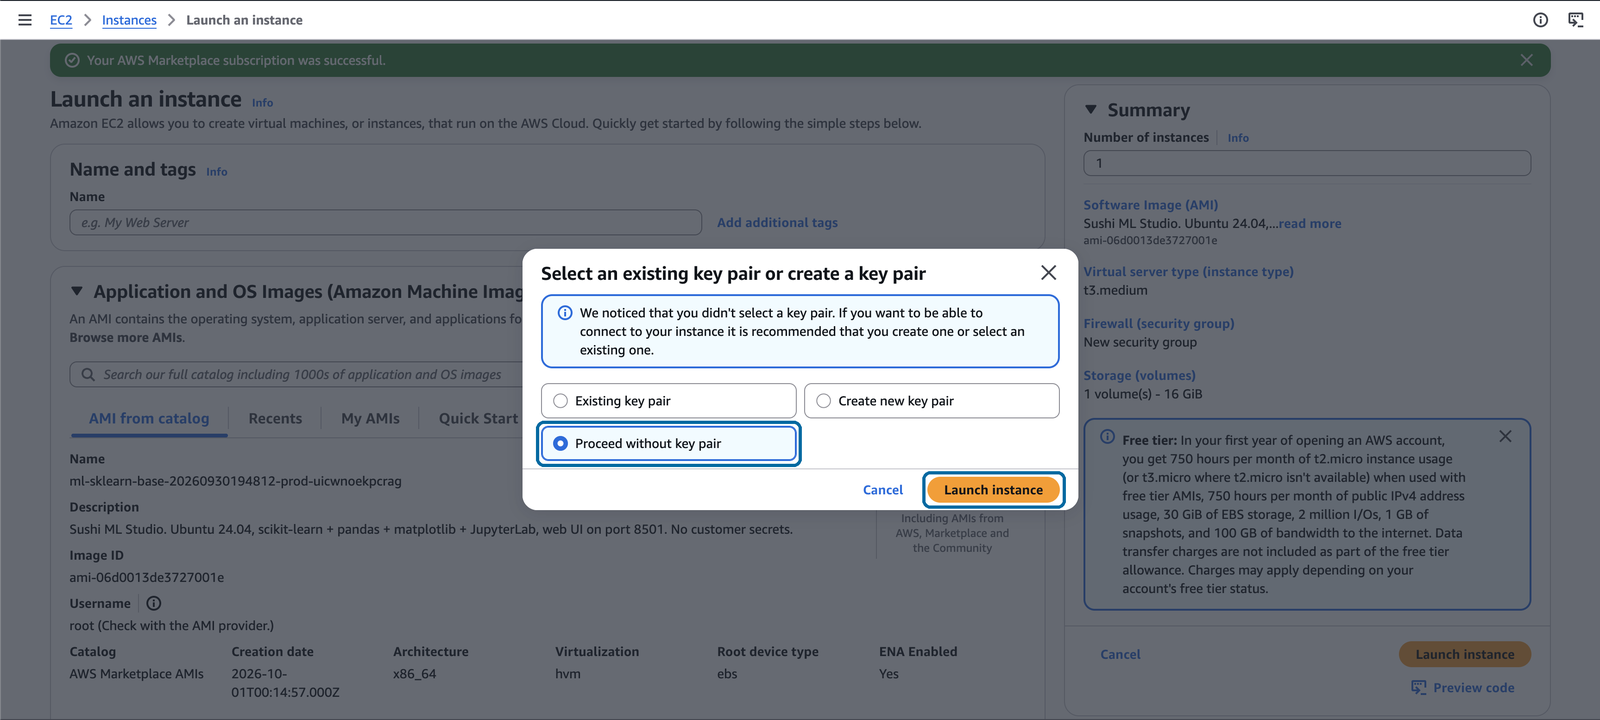
Choose Launch instance. AWS asks about a key pair. Choose Proceed without key pair, then Launch instance again.
When a key pair is worth having
You do not need one to use the Studio. A key pair is the simplest way to connect with your own SSH client later, for example to use JupyterLab or to copy files to the instance. EC2 attaches a key pair only at launch, so if you think you will want one, choose Create new key pair instead and keep the file it downloads. Without one, you can still open a terminal with EC2 Instance Connect, and add a key yourself later.
7. Copy the instance's address and ID
Open the EC2 console, choose Instances and select your new instance. When Instance state says Running, copy two things from the details:
- Public IPv4 address, the address of your Studio
- Instance ID, which starts with
i-. This is your first password.
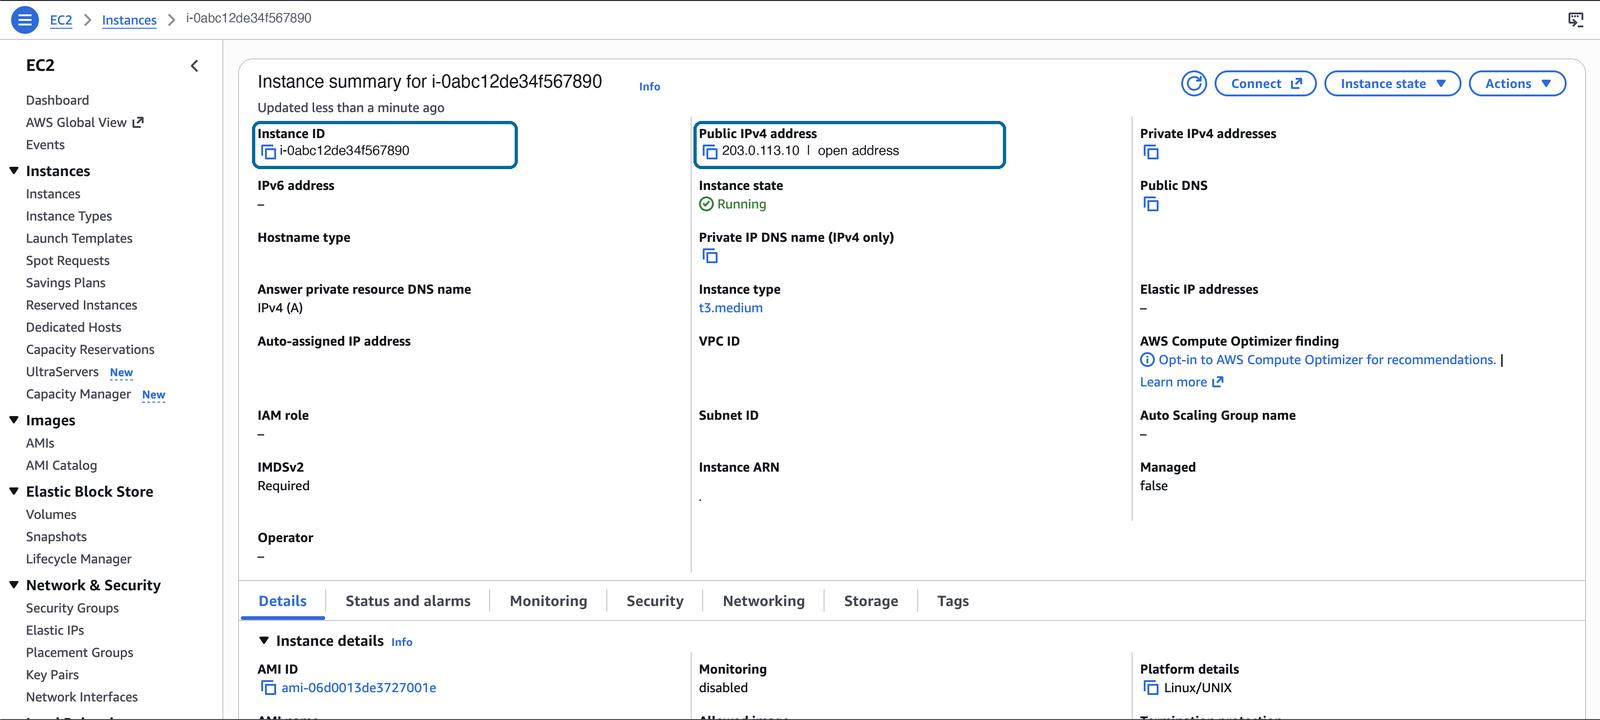
Do not use the open address link
The open address link next to the IP leaves out the Studio's port,
and may open https://, so it will not open the Studio. Type the address
yourself, as in the next step.
8. Open the Studio
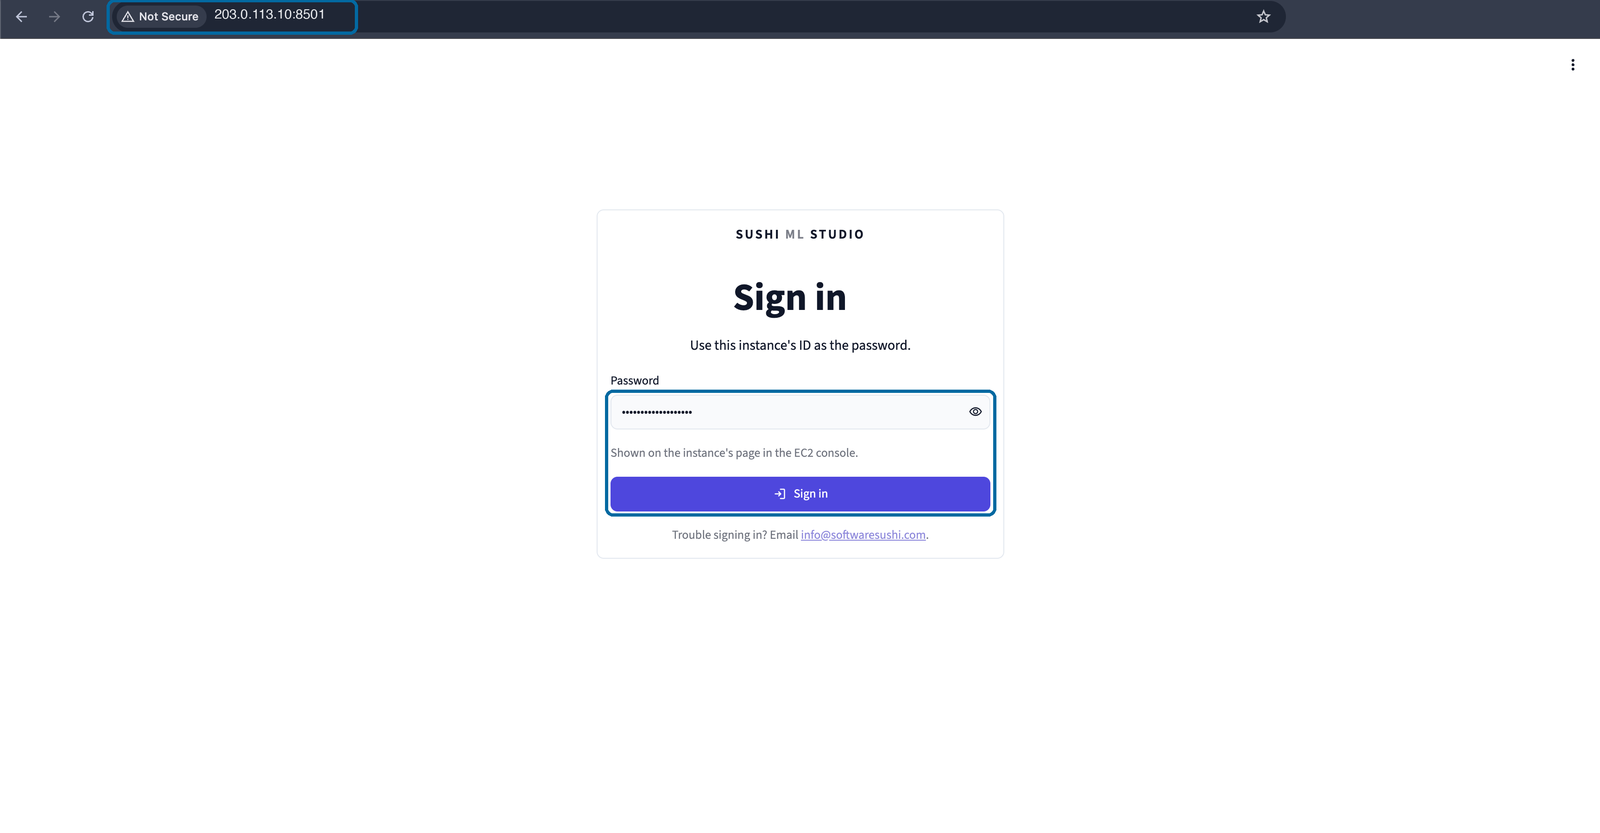
In a new browser tab, type the address like this, with your own IP:
http, not https
The address starts with http://, not https://, and ends with
:8501. With https:// the page will not load. Your browser may mark
the page as Not Secure (Chrome's wording), which is expected and does
not mean anything is wrong.
Give it a few minutes
The Studio needs 1 to 5 minutes to start after the instance shows Running. If the page does not load yet, wait a minute and refresh.
9. Sign in with the instance ID
Paste the Instance ID you copied into Password, and choose Sign in.
10. Choose your password and start
You are in. The Studio suggests replacing the instance ID with a password of your own. Choose Choose a password to do it now, which we recommend if anyone else can reach the Studio, or Not now to do it later.
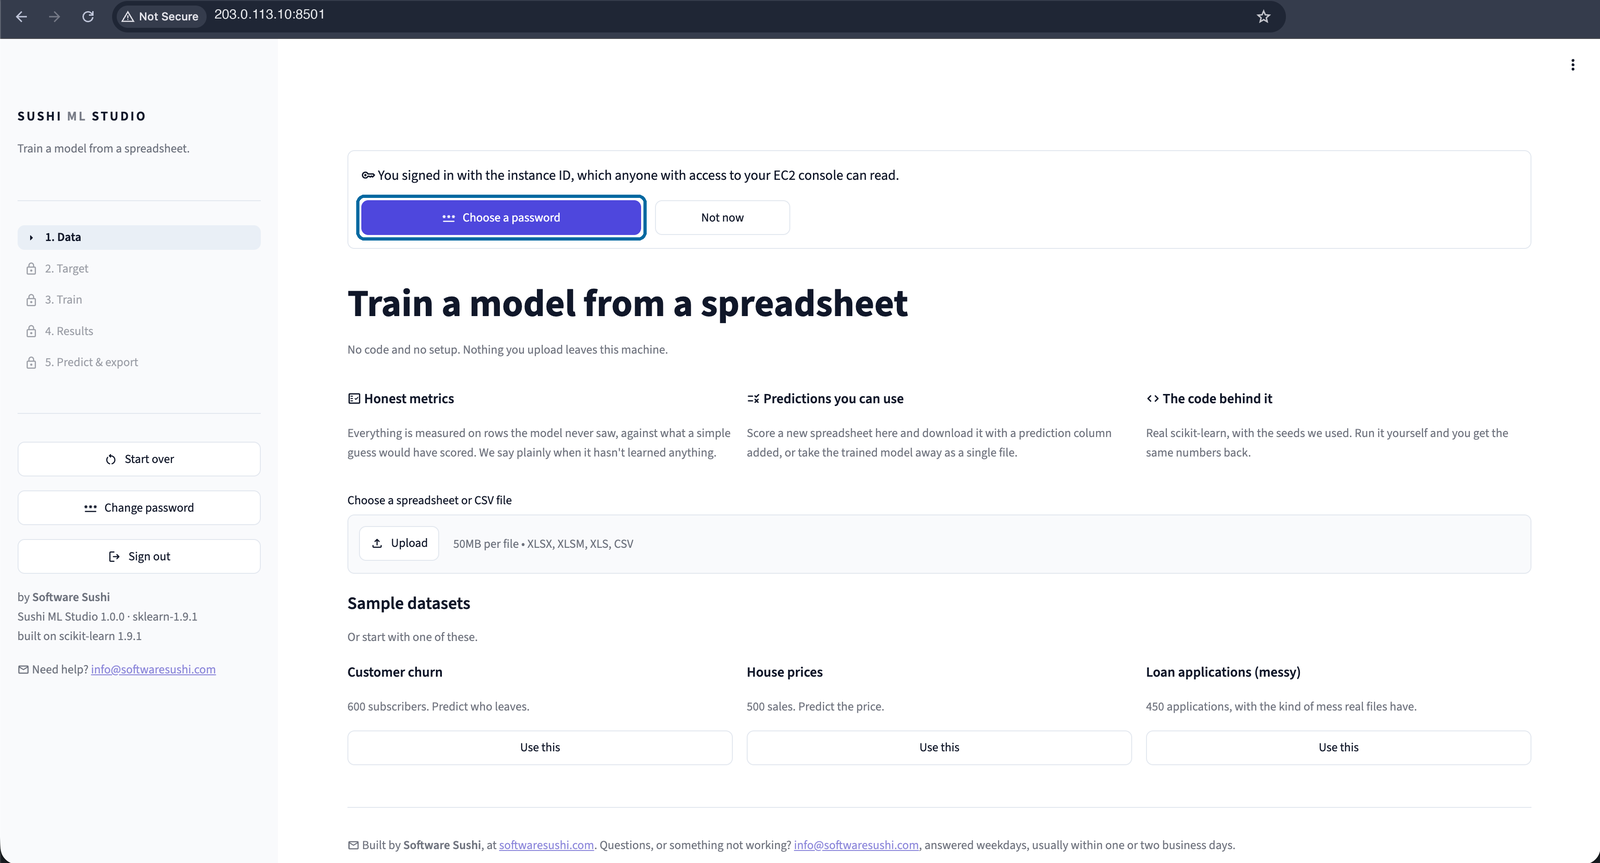
Then upload a spreadsheet, or pick one of the three examples to try it out.